Academic Tour
Logging in
To get started using Web-PA you need to log in to the system.
There's no need to register with this new version of Web-PA, all your modules and students are already setup for you.
If you haven't already, login using your normal username and password to begin.
Web-PA Home Page
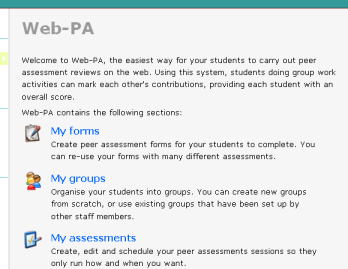
Having logged in, you should be looking at the Web-PA home page. This screen is the hub from which you access the three main areas in the system:
- Forms : The criteria and questions that your students will use to mark each other.
- Groups : The groups and teams of students that will take part in the peer assessment.
- Assessments : The actual peer assessments, comprising a date/time, a form, and the groups to assess.
My Forms
In this section you can create and manage your assessment forms. If you just want to create a tweaked version of an existing form, you can clone one you've already done!
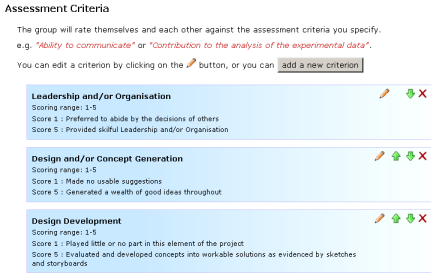
Using the form editing tools, you can add, remove and re-arrange the assessment criteria for each form.
Every criteria has a scoring range and a description of what you're trying to assess, and what each score means. For example:
Leadership and/or Organisation
Scoring Range: 1-5
Score 1 : Preferred to abide by the decisions of others.
Score 5 : Provided skillful leadership and/or organisation.
My Groups
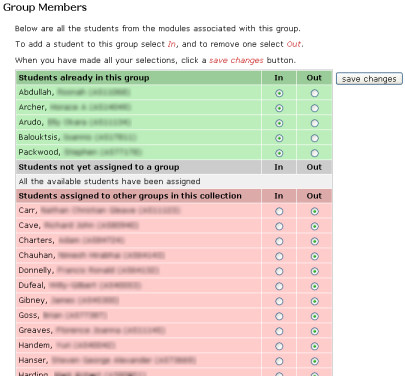
In this section you can create and manage your student groups. The system automatically reads your module list when you log in, so you can get on with creating groups straight away.
You begin my creating a collection, this is just a way of managing your groups as a single unit. Within the collection, you then add your groups and assign your students. Using the group editing tools, you can change the modules you want to draw your students from, and allocate those students to your groups.
Once you've created your groups you can reuse them, so if you want to run both formative and summative peer assessments with the same groups, you don't need to create them all over again!
My Assessments
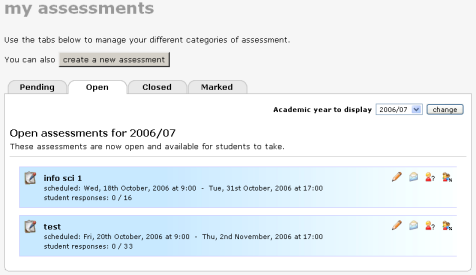
In this section you bring together the groups and forms you've setup to create an actual peer assessment. All the assessments you have created are listed under four headings; Pending, Open, Closed and Marked.
While an assessment is running you can monitor which students have taken the assessment and send out email reminders to those who haven't.
Once an assessment has closed, and the student responses are in, you can tweak the Web-PA algorithm to create a mark sheet, and then view your assessment reports.
Reports
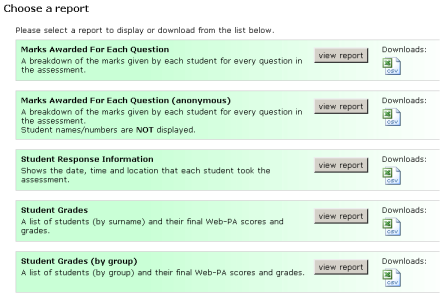
There are various reports available showing everything from the individual scores the students allocated to each other, to their final grades, and when and where they took the assessment.
As well as viewing the reports online, you can also download each one as an Excel Spreadsheet compatible file.
Thank you for taking the Web-PA academic tour.
For enquiries about the system, or if you're having problems with something, please get in touch through the Web-PA Contact system in the menu on the left.
If you want to take the tour again, you can go back to the beginning.
If you wish, you can also try the student tour.

